
The Complete Gokyo Lakes Trek Guide: Itinerary and Planning for 2026
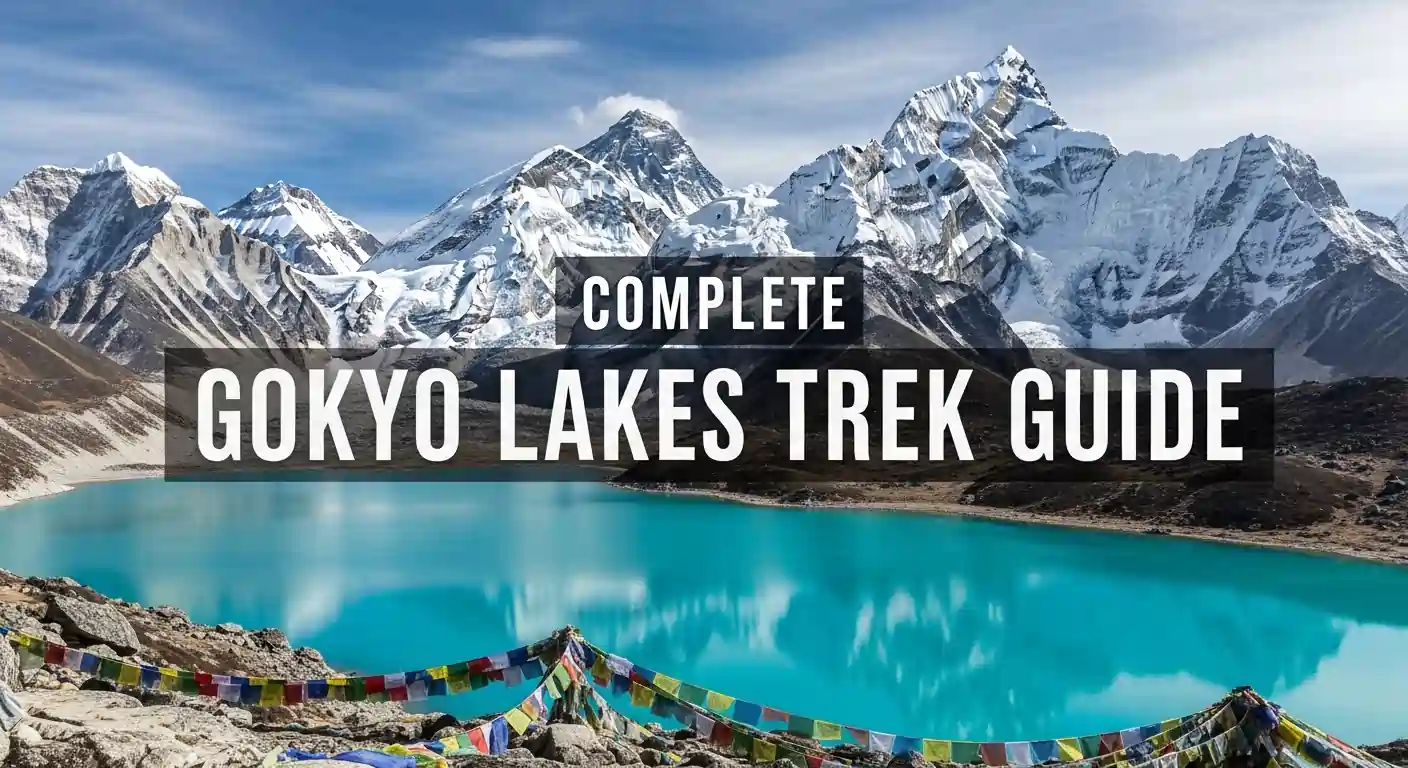
Imagine standing at 5,357 meters on Gokyo Ri as the sun breaks over Everest, Lhotse, Makalu, and Cho Oyu. Four of the world’s fourteen 8,000-meter peaks glow orange against a cobalt sky. Below you, turquoise glacial lakes stretch along Nepal’s longest glacier, and the trail you walked to get here saw maybe a tenth of the foot traffic on the classic Everest Base Camp route. The Gokyo Lakes trek offers arguably the best panoramic views in the Khumbu region without the crowds, but it demands the same respect for altitude, weather, and logistics as any high Himalayan journey.
In this blog about the Gokyo Lakes trek, we cover everything you need to plan your 2026 adventure with confidence. You’ll find a detailed day-by-day itinerary, permit requirements, acclimatization protocols, realistic cost breakdowns, and practical advice on choosing an operator that prioritizes safety and quality. Whether you’re comparing routes or finalizing logistics, this guide gives you the complete planning framework for one of Nepal’s most rewarding high-altitude treks.
What is The Gokyo Lakes Trek in Nepal?
The Gokyo Lakes trek is an 11-day high-altitude route in Nepal’s Khumbu region that takes you to six sacred glacial lakes and the Gokyo Ri viewpoint at 5,357 meters. You’ll walk through Sagarmatha National Park along the quieter western valley of the Everest region, where turquoise alpine lakes, four 8,000-meter peaks, and Nepal’s longest glacier await, all without the crowds of the classic Everest Base Camp trail.
The route starts with a flight to Lukla (2,860m) and follows the Dudh Koshi River through Sherpa villages before branching west at Namche Bazaar toward the Gokyo Valley. Most trekkers reach the third lake at Gokyo village (4,790m), though the trail continues to three additional lakes for those with extra time, and experienced trekkers sometimes incorporate Gokyo into the larger Three Passes Trek circuit.
Why Choose the Gokyo Lakes Trek Over Everest Base Camp?
The Gokyo Lakes trek offers better panoramic mountain views and fewer crowds than the Everest Base Camp. You’ll experience turquoise glacial lakes, see four 8,000-meter peaks from Gokyo Ri, and walk quieter trails through the same Khumbu region. The trek provides a more remote wilderness experience while maintaining similar difficulty levels and duration. Most trekkers find the combination of sacred lakes, massive glaciers, and superior viewpoints makes Gokyo the more rewarding choice.
1. Fewer crowds and a more remote trail experience
While the Everest Base Camp trail sees thousands of trekkers during peak season, the Gokyo route receives a fraction of that traffic once you pass Namche Bazaar. You’ll find quieter teahouses where you can have more personal interactions with lodge owners and learn about their daily lives in the mountains. The trail offers long stretches where you might not see another trekker for hours, giving you a genuine sense of wilderness. This solitude allows you to connect more deeply with the landscape and experience the Khumbu region at your own pace without the constant stream of hikers that characterizes the classic EBC route.
2. Turquoise glacial lakes not found on the EBC route
The striking blue-green color of the Gokyo lakes comes from glacial sediment suspended in the water, creating a visual spectacle you won’t find on the Everest Base Camp trek. The Sherpa community considers these lakes sacred sites associated with the deity Dudh Kunda, adding cultural and spiritual depth to the visual experience. You’ll encounter six lakes in total, with the third lake at Gokyo village being the most accessible and photographed. The contrast between the turquoise water, white glaciers, and surrounding peaks creates some of the most memorable scenery in the entire Himalayan region.
3. Gokyo Ri viewpoint for panoramic Himalayan views
Many experienced trekkers argue that Gokyo Ri offers better panoramic views than Kala Patthar on the EBC route, making it worth the challenging pre-dawn climb. From the 5,357-meter summit, you can see Everest, Lhotse, Makalu, and Cho Oyu (four of the world’s fourteen 8,000-meter peaks) all in a single sweeping vista. The massive Ngozumpa Glacier stretches below you, providing context for the scale of these Himalayan giants. Unlike Kala Patthar, which offers a closer but more limited view of Everest, Gokyo Ri gives you a true 360-degree panorama that includes the entire Gokyo Valley and its chain of turquoise lakes.
| Feature | Gokyo Lakes Trek | Everest Base Camp Trek |
| Crowd levels | Lower | Higher |
| Main attraction | Glacial lakes + Gokyo Ri | Base Camp + Kala Patthar |
| Trail difficulty | Moderate-challenging | Moderate-challenging |
| Duration | 10-12 days | 12-14 days |
Best Time to Trek to Gokyo Lakes Nepal
The best time to trek to Gokyo Lakes is during spring (March to May) and autumn (September to November) when weather conditions are most stable and mountain views are clearest, making this period widely considered the best season for trekking in Nepal. Spring offers warmer temperatures and blooming rhododendrons, while autumn provides the best visibility for photography and panoramic views. Winter brings extreme cold and lodge closures above Machermo, and monsoon season means daily rain, clouds, and slippery trails. Your choice depends on whether you prioritize fewer crowds, optimal weather, or specific seasonal landscapes.
1. Spring season from March to May
Spring brings warmer temperatures and blooming rhododendrons in the lower forests, creating colorful landscapes along the trail. Visibility can be slightly hazier than autumn due to atmospheric moisture in the air, but you’ll still get clear mountain views on most days. Trail traffic remains moderate during this season, one of the reasons Gokyo ranks among the best spring treks in Nepal, making it easier to find accommodation without advance bookings. Teahouses are fully operational throughout the route, and the warmer weather means more comfortable trekking conditions at higher elevations.
2. Autumn season from September to November
Clear skies and stable weather patterns make autumn the most popular trekking season in the Khumbu region. The post-monsoon air provides optimal mountain visibility, perfect for photographers seeking crisp shots of the Himalayan peaks. First-time Himalayan trekkers prefer this season because weather conditions are predictable and temperatures are comfortable for high-altitude walking. You’ll share the trail with more people during peak autumn months, and popular teahouses fill quickly, so booking through an operator helps secure accommodation.
3. Winter and monsoon trekking considerations
Winter trekking from December to February brings extreme cold at higher elevations, with temperatures dropping well below freezing at night. Some lodges above Machermo close entirely during winter months, limiting your accommodation options and requiring careful planning. Monsoon season from June to August means daily afternoon rain, slippery trails, and leeches in lower forest sections. Clouds often obscure mountain views during monsoon, and the risk of landslides increases on certain trail sections, making it the least recommended time for the Gokyo Lakes trek.
Complete Gokyo Valley Trek Itinerary
The standard Gokyo Lakes trek follows an 11-day itinerary designed to balance altitude gain with proper acclimatization. The route begins with a flight to Lukla, follows the Dudh Koshi River to Namche Bazaar, then branches west into the quieter Gokyo Valley. Each day’s walking time ranges from 3 to 6 hours, with a dedicated rest day at Namche and a summit day at Gokyo Ri before retracing your steps back to Lukla.
Day 1: Fly to Lukla and trek to Phakding
The 25-minute flight from Kathmandu to Lukla offers dramatic mountain views before landing at one of the world’s most challenging airstrips. From Lukla, a gentle 3-4 hour walk along the Dudh Koshi River brings you to Phakding (2,610m). The trail descends gradually through pine forests and small Sherpa settlements, crossing several suspension bridges along the way. This first day keeps altitude gain minimal, allowing your body to begin adjusting to the thinner air while you settle into the rhythm of trekking.
Day 2: Phakding to Namche Bazaar
This challenging day involves crossing multiple suspension bridges and a steep 600-meter climb to Namche Bazaar (3,440m). Expect 5-6 hours of walking, with your first glimpse of Everest appearing near the final ascent. The trail follows the Dudh Koshi River through dense forests before the demanding uphill push to Namche, the bustling Sherpa capital of the Khumbu region. You’ll notice the air getting thinner as you climb, so pace yourself and take regular breaks to manage the elevation gain.
Day 3: Acclimatization day in Namche Bazaar
Spending a full day at Namche allows your body to produce additional red blood cells at altitude. Consider hiking to the Everest View Hotel or Khumjung village, following the “climb high, sleep low” principle. These acclimatization hikes take you higher during the day before returning to sleep at Namche’s elevation, helping your body adapt more effectively. Use this rest day to explore the local market, visit the Sherpa museum, or simply relax and hydrate while your physiology adjusts to the altitude.
Day 4: Namche Bazaar to Dole
Here the trail diverges from the EBC route, heading northwest through rhododendron forests into the quieter Gokyo Valley. The 5-6 hour trek to Dole (4,110m) marks your entry into more remote territory. You’ll notice fewer trekkers on the path as you leave the main Everest corridor behind, passing through traditional villages like Phortse Thanga. The landscape begins to shift from forested hillsides to more open alpine terrain as you gain elevation steadily throughout the day.
Day 5: Dole to Machermo
A gradual ascent through yak pastures brings you to Machermo (4,470m), a small settlement with basic teahouses. The trail climbs steadily but not steeply, allowing for comfortable acclimatization as you move higher into the valley. You’ll pass through Luza and Lhabarma, tiny settlements where yak herders graze their animals during warmer months. The vegetation becomes sparser at this elevation, and the mountain views begin to dominate the landscape around you.
Day 6: Machermo to Gokyo
You’ll pass the first and second Gokyo lakes before arriving at Gokyo village (4,790m), situated on the shore of the third lake. The turquoise water against the backdrop of Cho Oyu creates one of the trek’s most memorable scenes. This 4-5 hour walk takes you alongside the massive Ngozumpa Glacier, giving you a sense of the immense ice rivers that carved this valley. The sight of the sacred lakes appearing one by one builds anticipation for your arrival at Gokyo, where you’ll spend two nights to acclimatize before the summit push.
Day 7: Gokyo Ri summit and fifth lake excursion
Most trekkers start the Gokyo Ri climb before dawn to catch sunrise over the Himalayan giants. The 2-3 hour ascent is steep but non-technical, rewarding you with views of four 8,000-meter peaks from the 5,357-meter summit. In the afternoon, an optional hike to the fourth and fifth lakes offers closer views of Everest’s base and the upper reaches of the Ngozumpa Glacier. This is your most demanding day on the trek, so proper hydration and pacing are essential to manage the altitude and physical exertion.
Day 8: Gokyo to Dole
The descent goes faster than the climb, though downhill days demand attention to knee care and footing on rocky terrain. You’ll retrace your steps through Machermo and back to Dole, covering in one day what took two on the way up. The thicker air at lower elevations makes breathing easier and energy levels higher, but the constant downhill walking can be tough on knees and ankles. Trekking poles become especially valuable on descent days to reduce impact on your joints and maintain balance on uneven sections.
Day 9: Dole to Namche Bazaar
Returning through familiar terrain often reveals details you missed on the way up, and the thicker air at lower elevation brings noticeable relief. The 5-6 hour trek back to Namche (3,440m) feels easier than the ascent, though the trail still requires attention on steep sections. You’ll appreciate the relative comfort of Namche’s well-established teahouses after the more basic lodges higher in the valley. This is a good day to celebrate your achievement with a hot shower and a hearty meal in one of Namche’s bakeries.
Day 10: Namche Bazaar to Lukla
A long descent day prepares you for departure, with time to explore Lukla’s small shops and cafes. The 6-7 hour trek retraces your original route through Phakding and along the Dudh Koshi River back to where your journey began. Your legs will feel the cumulative effect of multiple trekking days, but the lower elevation makes breathing easy and walking comfortable. Arriving in Lukla marks the end of your high-altitude adventure, and most trekkers spend the evening sharing stories with their guides and porters.
Day 11: Fly from Lukla to Kathmandu
Weather-related flight delays are common at Lukla, so building buffer days into your itinerary is wise. Morning flights have the best chance of departing before afternoon clouds and wind make flying unsafe. The 25-minute flight back to Kathmandu reverses your dramatic arrival, offering one last aerial view of the mountains you just walked through. Once you land in Kathmandu, you’ll have time to rest, process your experience, and begin planning your next Himalayan adventure.
Permits and Visas for Gokyo Lake Trekking Nepal
Trekking to Gokyo Lakes requires several permits and entry documents that you’ll need to arrange before or during your journey. You’ll need a Sagarmatha National Park entry permit, a Khumbu Rural Municipality permit, a TIMS card for trekker registration, and a Nepal tourist visa. Most trekking operators handle permit arrangements as part of their package, but understanding each requirement helps you budget accurately and avoid delays. Here’s what you need to secure for legal entry into the Gokyo region.
1. Sagarmatha National Park entry permit
All trekkers entering Sagarmatha National Park must pay an entry fee of NPR 3,000 for foreign nationals. You can obtain this permit at the Nepal Tourism Board office in Kathmandu before your trek or directly at the park entrance gate in Monjo on your way to Namche Bazaar. The permit is mandatory for legal entry into the Gokyo region and will be checked at multiple points along the trail. Keep your permit accessible throughout the trek, as park officials verify it at various checkpoints.
2. Khumbu Rural Municipality entry permit
The Khumbu Rural Municipality permit is a local entry requirement that replaced the previous permit system in the region. This permit is collected at designated checkpoints along the trekking route as you progress through the valley. Your trekking operator typically arranges this permit in advance as part of your package, handling the paperwork and fees on your behalf. The permit helps fund local infrastructure and community development projects in the Khumbu region, directly supporting the villages you pass through during your trek.
3. TIMS card requirements
The Trekkers’ Information Management System (TIMS) card is a registration document that tracks trekker movements for safety and emergency response purposes. Guided trekkers receive a “green” TIMS card, which your trekking operator arranges as part of their service package. The card contains your personal details, trek itinerary, and emergency contact information that authorities can access if needed. You’ll need to present your TIMS card at checkpoints alongside your other permits, so keep it with your passport and permit documents throughout the trek.
4. Nepal tourist visa
Nepal offers convenient visa-on-arrival services for most nationalities at Tribhuvan International Airport in Kathmandu. You’ll need to bring passport-sized photos and cash (USD) to pay the visa fee, which varies by duration: 15 days costs $30, 30 days costs $50, and 90 days costs $125. The visa application process at the airport is straightforward, though lines can be long during peak trekking seasons. Make sure your passport has at least six months of validity remaining from your date of entry to avoid any complications at immigration.
Do You Need a Guide for the Gokyo Lakes Trek?
Yes, you need a licensed guide for the Gokyo Lakes trek. Nepal’s current regulations require all foreign trekkers in national parks to hire a licensed guide, making solo independent trekking in the Gokyo region no longer permitted. Beyond legal requirements, a local guide recognizes early altitude sickness symptoms, navigates trail conditions, and handles permit checkpoints efficiently. Guides also provide cultural context and ensure proper acclimatization schedules that significantly improve your safety and experience at high altitude.
1. Current trekking regulations in Nepal
Recent policy changes in Nepal now require all foreign trekkers entering national parks to hire a licensed guide for their journey. Solo independent trekking in the Gokyo region is no longer permitted under current regulations, making it mandatory to trek with professional support. These rules were implemented to improve trekker safety and ensure proper emergency response protocols are in place. The regulations apply to all foreign nationals, regardless of previous trekking experience or fitness level.
2. Benefits of trekking with a licensed local guide
A licensed local guide from the Khumbu region brings invaluable expertise that significantly enhances your trekking experience and safety. They can recognize early signs of altitude sickness before symptoms become serious, allowing for timely intervention and proper acclimatization adjustments. Local guides know which teahouses serve the best food and offer the most comfortable accommodation along the route. Beyond logistics, they share cultural context about Sherpa traditions, Buddhist practices, and mountain history that transforms a simple hike into a meaningful cultural journey.
3. What to expect from a professional trekking team
A typical professional trekking team includes a lead guide who manages the itinerary and ensures your safety throughout the journey. Larger groups may also have an assistant guide to provide additional support and maintain proper guide-to-trekker ratios. Porters carry the bulk of your gear, with ethical operators limiting loads to 20 to 25 kilograms per porter to ensure fair working conditions. Marvel Treks ensures all staff members are properly insured, equipped with necessary gear, and fairly compensated for their work in the mountains.
How to Get to the Gokyo Trek Trailhead?
You reach the Gokyo trek trailhead by flying from Kathmandu to Lukla’s Tenzing-Hillary Airport, a 25-minute flight that operates only in good weather conditions. The flight lands at 2,860 meters, where your trek officially begins with a walk to Phakding on the first day. If Lukla flights are cancelled due to weather, an alternative overland route via Salleri adds 3-4 extra trekking days but eliminates flight uncertainty. Most trekkers build 2-3 buffer days into their itinerary to account for potential flight delays, with helicopter transfers available as a more expensive backup option.
1. Flying from Kathmandu to Lukla
The flight to Tenzing-Hillary Airport in Lukla operates only in good weather conditions, with most departures scheduled for early morning when winds are calmest and visibility is best. The 25-minute flight offers stunning aerial views of the Himalayas as you approach one of the world’s most challenging mountain airstrips. Airlines use small twin-engine aircraft designed for short takeoff and landing on Lukla’s sloped runway. Weather conditions can change rapidly in the mountains, so flights operate on a strict weather-dependent schedule that prioritizes passenger safety above all else.
2. Alternative route via Salleri and Phaplu
If Lukla flights are cancelled due to weather, an alternative overland route involves a 10-12 hour jeep ride from Kathmandu to Salleri or Phaplu in the lower Solu region. From Salleri, you’ll need to add 3-4 extra trekking days to reach Lukla and join the standard Gokyo route, walking through traditional Sherpa villages and terraced farmland. This option eliminates the uncertainty of waiting for flights to resume and guarantees you’ll reach the trailhead regardless of weather conditions. The overland approach offers a more gradual acclimatization profile and a deeper immersion into rural Nepali life, though it requires additional time and physical effort.
3. Handling Lukla flight delays and cancellations
Weather-related flight delays at Lukla can stack up for multiple days during periods of poor visibility, strong winds, or heavy cloud cover in the mountains. Building 2-3 buffer days into your overall itinerary is essential to avoid missing international flight connections when returning to Kathmandu. Most trekking operators monitor weather forecasts closely and adjust departure schedules to maximize your chances of flying on time. Helicopter flights offer a more expensive but significantly more reliable backup option, with better ability to navigate marginal weather conditions and flexible departure times throughout the day.
Accommodation and Teahouses on the Gokyo Lake Trek
Accommodation along the Gokyo Lakes trek consists of family-run teahouses that provide basic but functional lodging at each overnight stop. You’ll find twin-bedded rooms, communal dining areas, and shared bathroom facilities throughout the route, with comfort levels decreasing as you gain altitude. Teahouse standards vary from well-established lodges in Namche Bazaar to more rustic shelters at Gokyo village. Understanding what to expect at different elevations helps you pack appropriately and set realistic expectations for your nightly accommodations.
1. Teahouse standards from Namche to Gokyo
Teahouses in the Khumbu region offer basic but comfortable accommodation with twin beds fitted with foam mattresses and blankets. You’ll find shared squat or Western-style toilets at most lodges, with communal dining areas warmed by yak-dung stoves that become the social hub each evening. Rooms are simple with plywood walls that offer minimal sound insulation, so earplugs can be helpful for light sleepers. Most teahouses provide basic bedding, but bringing your own sleeping bag ensures warmth and hygiene throughout the trek.
2. What to expect at higher elevation lodges
Above Machermo, teahouse facilities become noticeably more basic as you move into more remote sections of the valley. Rooms are colder with minimal heating, hot water becomes scarce and expensive, and menu options shrink to simple dal bhat, noodles, and soups. The lodges at Gokyo village are functional but spartan, with thinner walls and colder temperatures that make a quality sleeping bag essential. Bringing a sleeping bag rated to -15°C makes a significant difference in your comfort level at higher elevations, especially during early morning and nighttime hours when temperatures drop well below freezing.
3. Booking and availability during peak season
During October and November peak trekking season, popular teahouses along the Gokyo route fill quickly, especially at key stops like Namche, Dole, and Gokyo village. Guided groups typically have reservations arranged in advance by their trekking operator, ensuring accommodation is secured before arrival. Independent trekkers may need to arrive early in the afternoon to secure beds at preferred lodges during busy periods. Traveling with a reputable operator like Marvel Treks eliminates accommodation uncertainty, as your guide handles all bookings and ensures you have confirmed lodging at each overnight stop.
Altitude Sickness and Acclimatization on the Gokyo Trek
Altitude sickness is the most serious risk on the Gokyo Lakes trek, affecting trekkers regardless of fitness level or previous experience. The trek reaches 5,357 meters at Gokyo Ri, where reduced oxygen levels can trigger symptoms ranging from mild headaches to life-threatening conditions. Proper acclimatization schedules, recognizing warning signs early, and knowing when to descend are essential skills that can prevent serious illness. Understanding the different forms of altitude sickness and following proven acclimatization protocols significantly improves your safety and success on this high-altitude journey.
1. Understanding AMS, HAPE, and HACE
- AMS (Acute Mountain Sickness): Common mild symptoms including headache, nausea, and fatigue, usually manageable with rest and hydration
- HAPE (High Altitude Pulmonary Edema): Fluid accumulation in the lungs, a serious condition requiring immediate descent
- HACE (High Altitude Cerebral Edema): Brain swelling, a life-threatening emergency requiring immediate descent
2. Acclimatization schedule built into the itinerary
The rest day at Namche Bazaar allows your body to adapt before climbing higher. The gradual altitude gain built into standard itineraries follows established mountaineering safety principles: no more than 300-500 meters of sleeping elevation gain per day above 3,000m.
3. Warning signs and when to descend
Descent is the only reliable treatment for serious altitude illness. Watch for persistent severe headache not relieved by medication, confusion or loss of coordination, breathlessness while resting, persistent vomiting, or gurgling sounds when breathing.
4. Emergency evacuation and helicopter rescue
Helicopter rescue from the Gokyo region typically costs $3,000-$5,000 USD, covered by travel insurance with appropriate high-altitude provisions. Your guide carries communication equipment to coordinate evacuations.
Gokyo Lakes Trek Cost and Budget Breakdown
The Gokyo Lakes trek typically costs between $1,200 and $2,000 USD per person for a fully guided package, with final pricing depending on group size, service level, and inclusions. Beyond the base package, you’ll need to budget for extras like hot showers, device charging, bottled water, and staff tips that add up during the trek. Travel insurance with high-altitude coverage is mandatory and represents an additional upfront cost. Understanding both the package price and hidden expenses helps you budget accurately and avoid financial surprises on the trail.
1. Guided package costs and inclusions
A fully guided Gokyo Lakes trek typically costs $1,200-$2,000 USD per person, depending on group size and service level. Packages generally include permits, teahouse accommodation, meals, guide and porter services, and airport transfers. Marvel Treks includes complimentary gear loans (down jacket, sleeping bag, duffel bag) that reduce overall equipment costs.
2. Hidden costs to plan for
Even with an “all-inclusive” package, budget extra for:
- Hot showers: $3-5 per shower at teahouses
- Device charging: $2-5 per charge, increasing with altitude
- Bottled water or purification: $3-5 daily
- Tips: $10-15 per day for guides, $8-10 per day for porters (customary)
3. Travel insurance requirements
Standard travel insurance policies typically exclude high-altitude trekking activities, so you need specialized coverage for the Gokyo Lakes trek. Look for a policy that explicitly covers trekking above 4,000 meters, includes helicopter evacuation from remote mountain areas, and lists adventure activities in its coverage terms. Most reputable insurers offer specific trekking or mountaineering add-ons that provide the necessary protection for high-altitude journeys in Nepal. Verify your policy details before departure to ensure you have adequate coverage for emergency medical treatment and evacuation costs that can exceed $5,000 USD.
What to Pack for the Gokyo Valley Trek?
Pack a layering system with moisture-wicking base layers, insulating mid-layers, waterproof outer shells, and broken-in trekking boots for the Gokyo Valley trek. You’ll need clothing that handles temperatures ranging from 15°C during sunny afternoons to -15°C or colder at high elevations before dawn. Essential gear includes trekking poles for knee support on descents, a quality sleeping bag rated to -15°C, and sun protection items like sunglasses and high-SPF sunscreen. Many items like down jackets and sleeping bags can be rented in Kathmandu or borrowed from operators like Marvel Treks to reduce luggage weight and costs.
1. Clothing layers for variable weather
A proper layering system is essential for handling the extreme temperature variations you’ll experience on the Gokyo trek. Start with moisture-wicking base layers that pull sweat away from your skin, add insulating mid-layers like fleece or down jackets for warmth, and finish with a waterproof outer shell to protect against wind and precipitation. Temperatures can range from a comfortable 15°C during sunny afternoon walks in lower elevations to a frigid -15°C or colder at Gokyo Ri before dawn. Pack enough layers to add or remove clothing as conditions change throughout each day, ensuring you stay comfortable without overheating or getting too cold.
2. Footwear and trekking gear
Waterproof trekking boots with solid ankle support are your most important equipment investment for the Gokyo Lakes trek. Make sure your boots are fully broken in before departure to prevent blisters and hot spots during long trekking days on rocky, uneven terrain. Trekking poles are highly recommended as they significantly reduce knee strain on steep descents and provide stability when crossing streams or navigating loose rocks. Bring gaiters to keep snow, mud, and small stones out of your boots, especially useful at higher elevations where you may encounter snow patches.
3. Gear you can rent in Kathmandu or Namche
Down jackets, sleeping bags rated for cold temperatures, and trekking poles are widely available for rent in Thamel district in Kathmandu and at shops in Namche Bazaar. Rental costs are reasonable, typically $1 to $2 per day per item, making it an economical option if you don’t want to invest in expensive gear for a single trek. Quality varies among rental shops, so inspect items carefully for cleanliness, functionality, and proper sizing before accepting them. Marvel Treks provides complimentary use of essential items like down jackets, sleeping bags, and duffel bags as part of their package, eliminating the hassle of finding and renting gear on your own.
How to Choose a Trekking Operator for Gokyo Lakes Nepal
Choose a trekking operator based on transparent pricing, verified local presence, proper staff insurance, and clear emergency protocols, especially if you’re learning how to choose the best trekking company in Nepal. Look for Nepal-based companies that directly employ guides and porters, provide detailed package inclusions, and maintain responsive communication throughout the booking process. Verify the operator has a physical office in Kathmandu, positive reviews mentioning safety and guide quality, and fair compensation practices for their mountain staff. Avoid operators offering prices significantly below market rate, as this usually indicates compromised safety standards or underpaid porters.
1. Questions to ask before booking
What exactly is included in the package price? What is the guide-to-trekker ratio? How are porters compensated and insured? What happens if weather cancels flights? What emergency protocols are in place?
2. Red flags to avoid when selecting an operator
- Prices significantly below market rate: Usually means corners are cut on safety or staff compensation
- Vague inclusions: Reviews mentioning “hidden fees” are a warning sign
- No verifiable office address in Nepal: Indicates potential accountability issues
- Poor communication during inquiry: Suggests disorganization that may extend to the trail
3. Why local operators offer better value
Nepal-based operators eliminate middleman markups charged by international booking platforms and directly employ local guides and porters. Marvel Treks operates as a fully homegrown company, keeping economic benefits connected to local communities.
Plan Your Gokyo Lakes Trek with Confidence
The Gokyo Lakes trek delivers dramatic mountain scenery, authentic cultural encounters, and the personal achievement of reaching high altitude, without the crowds that can diminish the Everest Base Camp experience. With proper planning around permits, acclimatization, and operator selection, and by choosing the best expedition company in Nepal, you’re positioned for one of Nepal’s most rewarding trekking experiences.
Marvel Treks offers fully supported Gokyo Lakes itineraries with experienced local guides, complete permit handling, and complimentary gear. Explore Our Adventures to find your ideal departure date.
FAQs About the Gokyo Lakes Trek
How difficult is the Gokyo Lakes trek compared to Everest Base Camp?
The two treks have similar difficulty levels, with comparable daily distances and altitude profiles. Gokyo Ri’s summit day involves a steeper climb than Kala Patthar, but overall physical demands are roughly equivalent.
Can foreign trekkers visit Gokyo Lakes without hiring a guide?
Nepal’s current regulations require foreign trekkers in national parks to hire a licensed guide. Independent solo trekking in the Gokyo region is no longer permitted.
Is the hike to the fifth Gokyo Lake worth the extra effort?
The fifth lake offers the closest and most dramatic views of Everest’s base and sees far fewer visitors than Gokyo Ri. If you have energy remaining after your summit morning, it’s a worthwhile addition.
What happens if flights between Lukla and Kathmandu are cancelled?
Weather-related cancellations are common, especially during monsoon and winter. Building 2-3 buffer days into your itinerary is essential; alternatives include helicopter flights or the longer overland route via Salleri.
How much cash do trekkers carry on the Gokyo Lakes route?
Bring enough Nepali rupees to cover teahouse extras, hot showers, charging fees, snacks, and tips, typically NPR 30,000-50,000 depending on spending habits. ATMs are only available in Namche Bazaar.
Is mobile phone signal and WiFi available at Gokyo village?
Basic mobile coverage from Nepali carriers (Ncell and Nepal Telecom) reaches Gokyo, and most teahouses offer paid WiFi. Speeds are slow and connections unreliable at higher elevations.
Ready for your next Himalayan adventure?
Plan Your Next Big Adventure with Us
Explore Our AdventuresJoin our expert-guided journeys across Nepal and beyond, from classic trails to epic summits.